|
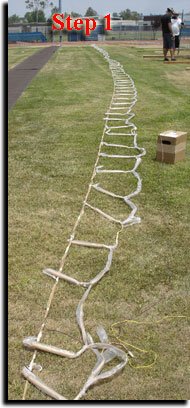
Step 1 - Layout falls effect on the ground, stretching it to its full length.
This first step allows you to inspect the entire device (step 3), and makes it easy to work with.
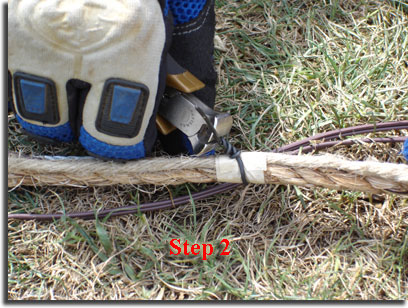
Step 2 - Attach steel aviation wire for structural support.
This step depends upon your method of "hanging" the falls effect. If your method of hanging the falls does not include large amounts of tension, then skip to step 3. The typical "support" line that comes with a waterfall effect is highly inadequate to hold under the amount of force it takes to tension a long falls effect to a horizontal position. The amount of tension is determined by the length (and therefore weight) of the falls line. The steel line also servers a secondary purpose of keeping the falls intact in the event the support line is burnt through during the show. This is a common occurrence since the composition burns extremely hot and for a relatively long period of time in each of the waterfall sticks. The two basic methods of attaching the steel line to the support rope are with either bailing wire or plastic zip ties. Zip ties are quickest, but more costly and also have the potential to be melted in a worse case scenario.
  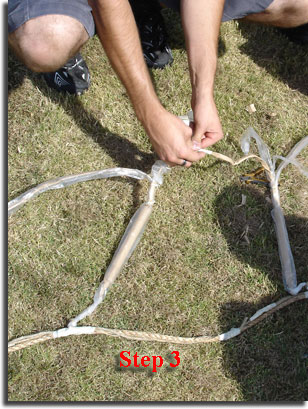
 Step 3 - Inspect falls, repair any defects. Step 3 - Inspect falls, repair any defects.
Since the waterfall effect is a cumulative effect of many waterfall sticks, it is essential that all of them function. Inspect the quick match which goes from stick to stick and repair any breaks or weak joints using masking tape. Check to make sure each of the waterfall sticks is connected securely to the support line as well.
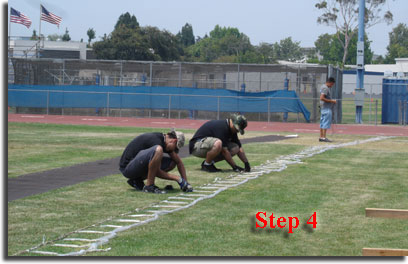
Step 4 - Run electrical "zip" wire along steel support line.
Attach the appropriate length of zip wire along the support line using plastic zip ties. The number of lengths of zip wire you run depends upon your particular wiring scheme (which there are many of).
Step 5 - Install electric matches along falls quickmatch leader.
The length of your waterfall will determine the number of electric matches you utilize. Technically you only need one electric match to ignite the entire string; however, depending on the type and quality of the quick match, you can have the fire chain reach one side to the other to slowly, causing one side to ignite and burn out 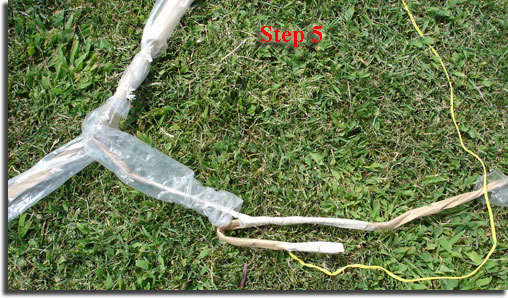 before the other, which removes the uniformity of the effect. Even more importantly is making sure you have a redundant fire path incase you get a blowout in the quickmatch along the way. So by using many electric matches, you ensure that your entire waterfall effect ignites simultaneously and completely. I typically go a step further and run two independent lengths of zip wire along the support line and wire every other electric match into them. In other words, if I have eight electric matches total, spaced evenly throughout the length of the water fall, 4 will be attached to one zip line, and 4 to the other. One line will have its matches wired in series, and the other will have its matches in parallel. Using this wiring scheme covers all your bases and accounts for faulty wiring, bad batch of electric matches, bad quick match, etc. before the other, which removes the uniformity of the effect. Even more importantly is making sure you have a redundant fire path incase you get a blowout in the quickmatch along the way. So by using many electric matches, you ensure that your entire waterfall effect ignites simultaneously and completely. I typically go a step further and run two independent lengths of zip wire along the support line and wire every other electric match into them. In other words, if I have eight electric matches total, spaced evenly throughout the length of the water fall, 4 will be attached to one zip line, and 4 to the other. One line will have its matches wired in series, and the other will have its matches in parallel. Using this wiring scheme covers all your bases and accounts for faulty wiring, bad batch of electric matches, bad quick match, etc.
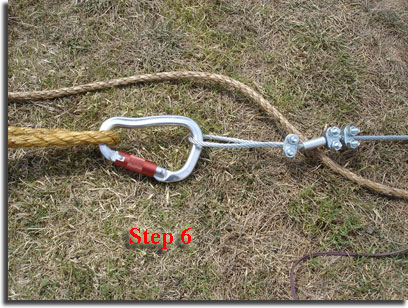
Step 6 - Attach steel support line to main tension line.
Attach the appropriate length of zip wire along the support line using plastic zip ties. The number of lengths of zip wire you run depends upon your particular wiring scheme (which there are many of).
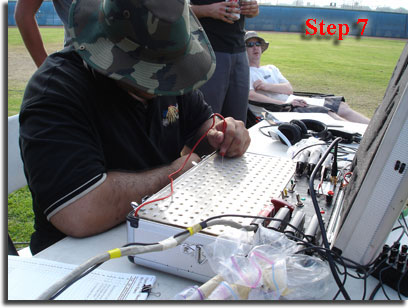
Step 7 - Run continuity check.
The most important thing to remember when running continuity on a waterfall effect is to make sure you do it before you string it in the air! The reason should be obvious. You need to of course run a second continuity check after you tension it as well.
 Step 8 - Raise and tension the waterfall effect. Step 8 - Raise and tension the waterfall effect.
This step is determined by your method of hanging the waterfall. If you need to tension it to a horizontal position between two objects, then some type of mechanical advantage could be used. There are so many different methods to hang a waterfall effect, since it is entirely dependent on the requirements of the firing location, that it is not practical to explain any further. Run your second continuity check once your waterfall is hung, and your done!
|